Install Imagick on cPanel/WHM Server

Install Imagick on cPanel WHM
What is Imagick?

Imagick on cPanel is the PHP extension that allows you to create and modify images using the ImageMagick software API.  Its an optional but recommended extension for WordPress websites, as well as many other popular CMS. 

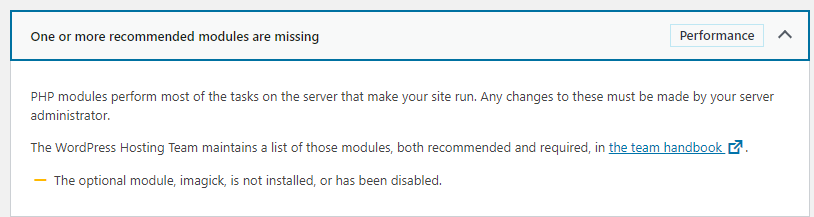
If you are running WordPress on a new cPanel installation, its definitely recommended to make sure you have installed Imagick.  If you don’t, you are likely to see a message like the image below on your Site Health tab

Install Imagick on cPanel WHM

If you are on a shared hosting service that offers cPanel, chances are you are its a CloudLinux system and you have access to the “Select PHP Version” module.  From there in the “Extensions” tab you can select the active PHP extensions for your account.  The extensions are generally laid out sorted alphabetically and for most installations you can find imagick near the bottom left.

To install Imagick on cPanel, first you need to log into WHM as the root user.

Once you are logged into WHM as the root user, search for “Module Installers” and select that module in the menu.

In the list of module installers, click on the link beside “PHP PECL” that reads “Manage”.

In the input field below where it says “Install a PHP PECL” –  Type in “imagick” then click “Install Now”.  This will begin the installation of the php module for using Imagick on cPanel.

Install Imagick on cPanel WHM

You’ll see a prompt like above while WHM does its thing, but you will have Imagick on your cPanel server in no time.  

Get paid to Google search

Be the first to comment

Leave a Reply

Your email address will not be published.


*