In this article, you will be shown how to create a custom site block for your Nginx server. This custom site block will allow you to provision multiple sites to your Nginx web server and allows you to customise the configuration for each site instance easily.
This article is working with the same image that was used in the earlier article on Setting up an Nginx web server on Ubuntu 16.04/18.04 with MariaDB and PHP 7.2
The following is assumed for working through this article;
- You have either Ubuntu 16.04 or 18.04, as well as Nginx, MySQL & PHP installed.
- You have root or sudo access to the server.
1. Create the directory for your custom site block.
For this tutorial, I will be using /sites/ as the home directory for my website instances.
To create the directory, run;
sudo mkdir /sites
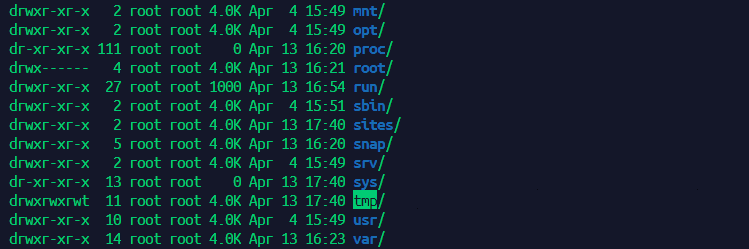
Then run;
ll -h /
You should see the directory in your servers root.
2. Create a default site directory and the required sub-directories
You will need to create your first site directory, I recommend making a default one to start, you can use it as a template for provisioning new sites later. You can script tools to automatically do this for you, we will get into that in a later tutorial however. Run the following commands;
sudo mkdir /sites/defaultsite.local
Next make three subdirectories within your new directory, etc, www and log
sudo mkdir /sites/defaultsite.local/www && sudo mkdir /sites/defaultsite.local/etc && sudo mkdir /sites/defaultsite.local/log
Change the ownership of the www directory to www-data by issuing sudo chown -R www-data:www-data /sites/defaultsite.local/www then make sure it has 755 permissions by issuing sudo chmod 755 /sites/defaultsite.local/www and then view your site directory to confirm the directories were created successfully by issuing
ll -h /sites/defaultsite.local

3. Add two configuration files to the /sites/defaultsite.local/etc directory
One of the configration files will be for http, the other for https. We will be setting the https config file to offline for now.
sudo nano /sites/defaultsite.local/etc/http.conf and then enter the following configuration and save and exit;
server {
listen 80;
listen [::]:80;
root /sites/defaultsite.local/www/;

index index.php index.html;

server_name defaultsite.local www.defaultsite.local;

access_log /sites/defaultsite.local/log/access.log;
error_log /sites/defaultsite.local/log/error.log;

location = /favicon.ico {
log_not_found off;
access_log off;
}

location = /robots.txt {
allow all;
log_not_found off;
access_log off;
}

location / {
try_files $uri $uri/ /index.php?$args;
}

location ~ \.php$ {
include snippets/fastcgi-php.conf;
fastcgi_pass unix:/run/php/php7.2-fpm.sock;
}

location ~* \.(js|css|png|jpg|jpeg|gif|ico|svg)$ {
expires max;
log_not_found off;
}

}
This takes care of the http configuration, which we will be using by default for now. Next we create the https configuration file, but set it to be disabled for the time being. sudo nano /sites/defaultsite.local/etc/https.conf.disable and paste in the following then save and exit;
# Redirect HTTP -> HTTPS
server {
    listen 80;
    server_name www.defaultsite.local defaultsite.local;
    return 301 https://defaultsite.local$request_uri;
}

# Redirect WWW -> NON WWW
server {
    listen 443 ssl http2;
    server_name www.defaultsite.local;
    # Lets Encrypt SSL
    ssl_certificate /etc/letsencrypt/live/defaultsite.local/fullchain.pem;
    ssl_certificate_key /etc/letsencrypt/live/defaultsite.local/privkey.pem;
    #ssl_trusted_certificate /etc/letsencrypt/live/defaultsite.local/chain.pem;

    # Custom SSL Certificate
    #ssl_certificate /sites/defaultsite.local/ssl/defaultsite.local.crt
    #ssl_certificate_key /sites/defaultsite.local/ssl/defaultsite.local.key

    #include /etc/nginx/snippets/ssl.conf;

    return 301 https://defaultsite.local$request_uri;
}

server {
    listen 443 ssl http2;
    server_name defaultsite.local;

    root /sites/defaultsite.local/www;
    index index.php index.html;

    # SSL parameters
    ssl_certificate /etc/letsencrypt/live/defaultsite.local/fullchain.pem;
    ssl_certificate_key /etc/letsencrypt/live/defaultsite.local/privkey.pem;
    #ssl_trusted_certificate /etc/letsencrypt/live/defaultsite.local/chain.pem;
    #include /etc/nginx/snippets/ssl.conf;
    #include /etc/nginx/snippets/letsencrypt.conf;

    # Custom SSL Certificate
    #ssl_certificate /sites/defaultsite.local/ssl/defaultsite.local.crt
    #ssl_certificate_key /sites/defaultsite.local/ssl/defaultsite.local.key

    # log files
    access_log /sites/defaultsite.local/log/ssl-access.log;
    error_log /sites/defaultsite.local/log/ssl-error.log;

    location = /favicon.ico {
        log_not_found off;
        access_log off;
    }

    location = /robots.txt {
        allow all;
        log_not_found off;
        access_log off;
    }

    location / {
        try_files $uri $uri/ /index.php?$args;
    }

    location ~ \.php$ {
        include snippets/fastcgi-php.conf;
        fastcgi_pass unix:/run/php/php7.2-fpm.sock;
    }

    location ~* \.(js|css|png|jpg|jpeg|gif|ico|svg)$ {
        expires max;
        log_not_found off;
    }
}
This will be the configuration that you would use if/when you have an SSL certificate installed for that domain. To activate, you would rename http.conf to http.conf.disable and https.conf.disable to https.conf and reload nginx (not yet though, please)
4. Include configuration files from your new site block into the nginx configuration.
Next we need to make sure Nginx is reading the configuration files from your custom site block, to do this we add an include into the nginx.conf file.
sudo nano /etc/nginx/nginx.conf
And then after the line that reads include include /etc/nginx/sites-enabled/*; add the following;
include /sites/*/etc/*.conf;
Save and exit the configuration file, then test nginx by running sudo nginx -t
If you get the following message back, restart nginx by issuing the command sudo systemctl restart nginx

5. Create a site instance for a real domain name (optional)
You can use the “defaultsite.local” instance as a template for creating new site instances easily by issuing the following commands. For the sake of this tutorial, I am using one of my parked domains “wpsitedesign.com.au” which I have already updated its DNS to point towards the server. Be sure to update any reference to “wpsitedesign.com.au” in this tutorial to your chosen domain, also be sure it is registered and its A records are pointing towards this server.
Create a new subdirectory for your new site instance.
sudo mkdir /sites/wpsitedesign.com.au
Copy your default site directory to the new subdirectory and make sure ownership of www is okay.
sudo rsync -avP /sites/defaultsite.local/ /sites/wpsitedesign.com.au
sudo chown -R www-data:www-data /sites/wpsitedesign.com.au/www

Update the references to defaultsite.local in the http.conf and https.conf.disable files to your domain name, for this I am going to use sed
First cd into the new site instances /etc directory.
cd /sites/wpsitedesign.com.au/etc
Next issue the following commands to update the references to defaultsite.local to your new domain name.
Dont forget to replace wpsitedesign.com.au in the code with your domain if you copy and paste.
sudo sed -i "s/defaultsite.local/wpsitedesign.com.au/g" http.conf
sudo sed -i "s/defaultsite.local/wpsitedesign.com.au/g" https.conf.disable
Test your nginx configuration with sudo nginx -t
If everything comes back OK, restart nginx with sudo systemctl restart nginx or reload with sudo systemctl reload nginx
Add your sites files to the www directory, be sure that all files and folders within here are owned by www-data, you may need to run
sudo -R www-data:www-data /sites/yourdomainname.ext/www after you’ve uploaded your files.
CONGRATULATIONS!! If youce made it this far you have successfully created a custom site block

Leave a Reply